התקנת TWiLight Menu++ (3DS)
ראשית תצטרכו שמכשיר ה3DS שלכם יהיה פרוץ עם קושחה מותאמת אישית. עקבו אחר 3ds.hacks.guide על מנת להתקין את הפריצה
התקנה #
- פתחו את FBI ובחרו
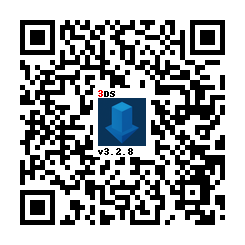
Remote Install, לאחר מכן בחרו thenScan QR Code - סרקו את קוד הQR הזה על מנת להתקין את הגרסה האחרונה של Universal-Updater

- סגרו את FBI ופתחו את Universal-Updater
- במידה ואתם לא רואים אותו בתפריט הבית, הפעילו מחדש את ה3DS שלכם
- מצאו את TWiLight Menu++ ברשימת התוכנות, ניתן לעשות חיפוש באמצעות הטאב השלישי בתפריט הצד במידה ואתם מתקשים במציאה שלו
- יש לו את האייקון הבא:

- יש לו את האייקון הבא:
- לחצו על A או לחצו על אייקון ההורדה בתפריט הצד ובחרו ב
TWiLight Menu++על מנת להתחיל את ההתקנה- This will take a while
- If installation fails, ensure the console is connected to the internet. Otherwise, click the
Manualtab
- הורידו את הגרסה האחרונה של
Universal-Updater.cia - שימו את הקובץ
Universal-Updater.ciaעל כרטיס הSD שלכם - פתחו את FBI ב3DS שלכם
- בFBI, לכו למקום שבו העתקתם את הקובץ
Universal-Updater.cia - סמנו את הקובץ
Universal-Updater.ciaובחרו ב”Install & Delete” - סגרו את FBI ופתחו את Universal-Updater
- במידה ואתם לא רואים אותו בתפריט הבית, הפעילו מחדש את ה3DS שלכם
- מצאו את TWiLight Menu++ ברשימת התוכנות, ניתן לעשות חיפוש באמצעות הטאב השלישי בתפריט הצד במידה ואתם מתקשים במציאה שלו
- יש לו את האייקון הבא:

- יש לו את האייקון הבא:
- לחצו על A או לחצו על אייקון ההורדה בתפריט הצד ובחרו ב
TWiLight Menu++על מנת להתחיל את ההתקנה- פעולה זו תמשך זמן מה
- If installation fails, ensure the console is connected to the internet. Otherwise, click the
Manualtab
- הורידו את הגרסה האחרונה של
TWiLightMenu-3DS.7z- If it does not download, see the release page
- חלצו את
TWiLightMenu-3DS.7z - העתיקו את התיקייה
_ndsלכרטיס הSD - העתיקו את
BOOT.NDSלכרטיס הSD - העתיקו את התיקייה
romsלכרטיס הSD - Copy the
.ciafile to your SD card root - On your 3DS, install the CIA with FBI
Accessing flashcard contents #
A flashcard is something that goes in the game card slot, and contains a microSD card slot. If you do not have a flashcard, you are done with this guide.
If you have an R4(i) Ultra #
- Follow this guide starting from
To run games using your flashcard firmware- You can safely ignore the warnings
- Open TWLMenu++ Settings
- Switch to the
Misc settingspage - Turn on
Slot-1 microSD access - Exit TWLMenu++ Settings by pressing
Bbutton- If you end up in the DS Classic Menu, press
Bagain
- If you end up in the DS Classic Menu, press
If you don’t have an R4(i) Ultra #
- Create a file or folder called
primaryinsd:/_nds/(not the flashcard one), so that TWiLight Menu++ reads settings from the console’s SD card after it starts your flashcard - Follow this guide starting from
Autobooting TWiLight Menu++ - Copy the
BOOT.NDSfile fromTWiLightMenu-Flashcard.7zto your flashcard’s microSD card root - Open TWLMenu++ Settings
- Switch to the
Misc settingspage - Turn on
SD access in Slot-1 - Turn on
SCFG access in Slot-1 - Turn on
Auto-start Slot-1 - Exit TWLMenu++ Settings by pressing
Bbutton- If you end up in the DS Classic Menu, launch your flashcard
- Otherwise, restart TWiLight Menu++
Switching between SD and flashcard contents #
- Press either
SELECT+UporSELECT+Downto switch between the SD and flashcard contents- If the SELECT menu is enabled, you can do so there as well
- If you use the 3DS theme, touch the Game Card/SD Card icon
- If you use the R4, GBC, or Wood themes, press
Rbutton
זקוקים לעזרה? הצטרפו לשרת הדיסקורד שלנו DS⁽ⁱ⁾ Mode Hacking! (אנגלית בלבד)