Installazione TWiLight Menu++ (3DS)
Prima di tutto avrai bisogno di un Custom Firmware installato sul tuo 3DS, segui 3ds.hacks.guide per installarlo
Installazione #
- Apri FBI e seleziona
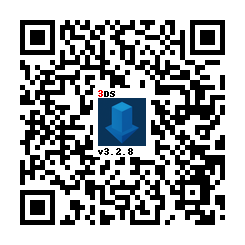
Remote Install, poiScan QR Code - Scannerizza questo QR code per installare l’ultima versione di Universal-Updater

- Chiudi FBI e avvia Universal-Updater
- Se questa opzione non è presente nel menu home, riavvia il tuo 3DS
- Trova TWiLight Menu++ nella griglia delle applicazioni, puoi effettuare una ricerca con la terza scheda sulla barra laterale se hai problemi a trovarla
- L’app ha questa icona:

- L’app ha questa icona:
- Premi A oppure tocca l’icona del download nella barra laterale e seleziona
TWiLight Menu++per installarla- This will take a while
- If installation fails, ensure the console is connected to the internet. Otherwise, click the
Manualtab
- Scarica l’ultima versione di
Universal-Updater.cia - Posiziona il file
Universal-Updater.ciaovunque sulla tua scheda SD - Avvia FBI sul tuo Nintendo 3DS
- Poi, naviga fino al posto dove hai piazzato il file
Universal-Updater.cia - Seleziona il file
Universal-Updater.ciae premi “Install & Delete” - Chiudi FBI e avvia Universal-Updater
- Se questa opzione non è presente nel menu home, riavvia il tuo 3DS
- Trova TWiLight Menu++ nella griglia delle applicazioni, puoi effettuare una ricerca con la terza scheda sulla barra laterale se hai problemi a trovarla
- L’app ha questa icona:

- L’app ha questa icona:
- Premi A o tocca l’icona del download nella barra laterale e seleziona
TWiLight Menu++per installarla- L’operazione potrebbe richiedere un po’ di tempo
- If installation fails, ensure the console is connected to the internet. Otherwise, click the
Manualtab
- Scarica la versione più recente di
TWiLightMenu-3DS.7z- If it does not download, see the release page
- Estrai
TWiLightMenu-3DS.7z - Copia la cartella
_ndsnella root della tua scheda SD - Copia il file
BOOT.NDSnella root della tua scheda SD - Copia la cartella
romsnella root della tua scheda SD - Copia il file
.cianella root della tua scheda SD - Sul tuo 3DS, installa il file CIA con FBI
Accesso al contenuto delle flashcard #
Una flashcard è un oggetto che si inserisce nello slot della scheda di gioco e contiene uno slot per schede microSD. Se non si possiede una flashcard, la guida finisce qui.
Se hai un R4(i) Ultra #
- Segui questa guida a partire da
Per avviare giochi utilizzando il firmware della flashcard- Puoi tranquillamente ignorare gli avvisi
- Apri le impostazioni di TWLMenu++
- Passa alla pagina
Impostazioni varie - Attiva
Accesso microSD Slot-1 - Esci dalle impostazioni TWLMenu++ premendo il pulsante
B- Se finisci nel menu DS classico, premi di nuovo
B
- Se finisci nel menu DS classico, premi di nuovo
Se non hai un R4(i) Ultra #
- Crea un file o una cartella chiamata
primaryinsd:/_nds/(non quella della flashcard), in modo che TWiLight Menu++ legga le impostazioni dalla scheda SD della console dopo aver avviato la flashcard - Segui questa guida a partire da
Avvio automatico TWiLight Menu++ - Copia il file
BOOT.NDSdaTWiLightMenu-Flashcard.7znella root della scheda microSD della tua flashcard - Apri le impostazioni di TWLMenu++
- Vai alla pagina
Impostazioni varie - Turn on
SD access in Slot-1 - Turn on
SCFG access in Slot-1 - Attiva
Avvio automatico Slot-1 - Esci dalle impostazioni TWLMenu++ premendo il pulsante
B- Se finisci nel menu DS classico, avvia la tua flashcard
- Altrimenti, riavvia TWiLight Menu++
Passare tra i contenuti della scheda SD a quelli della flashcard #
- Premi o
SELECT+SùoSELECT+Giùper passare dai contenuti della SD a quelli della flashcard- Se il menu SELECT è abilitato, puoi farlo anche lì
- Se utilizzi il tema 3DS, tocca l’icona della scheda di gioco/scheda SD
- If you use the R4, GBC, or Wood themes, press
Rbutton
Hai bisogno di aiuto? Entra nel nostro server Discord: DS⁽ⁱ⁾ Mode Hacking! (Solamente lingua Inglese)