Installing TWiLight Menu++ (3DS)
You will first need to have custom firmware on your 3DS, follow 3ds.hacks.guide to install it
Installing #
- Open Universal-Updater
- If you don’t have it, follow the working camera or non-working camera instructions
- Find TWiLight Menu++ in the app grid, you can search with the 3rd tab on the sidebar if you have trouble finding it
- Press A or tap the download icon in the sidebar and select
TWiLight Menu++to install it- This will take a while
- If installation fails, ensure the console is connected to the internet. Otherwise, use the manual method
- Open FBI and select
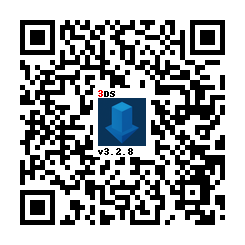
Remote Install, thenScan QR Code - Scan this QR code to install the latest version of Universal-Updater

- Close FBI and continue with the Universal-Updater method
- If it doesn’t show up on your home menu, reboot your 3DS
- Download the latest
Universal-Updater.cia - Place the
Universal-Updater.ciafile anywhere on your SD card - Launch FBI on your Nintendo 3DS
- In FBI, go to the place you pasted the
Universal-Updater.ciafile - Select the
Universal-Updater.ciafile and hit “Install & Delete” - Close FBI and continue with the Universal-Updater method
- If it doesn’t show up on your home menu, reboot your 3DS
- Download the latest
TWiLightMenu-3DS.7z- If it does not download, see the release page and scroll down to
Assetsto download the file
- If it does not download, see the release page and scroll down to
- Extract
TWiLightMenu-3DS.7z - Copy the
_ndsfolder to your SD card root - Copy the
BOOT.NDSfile to your SD card root - Copy the
romsfolder to your SD card root - Copy the
.ciafile to your SD card root - On your 3DS, install the CIA with FBI
Optional: If you want to play games from before the DS(i) & GBA and/or use other additional features (known as add-ons), see Installing Add-ons.
Accessing flashcard contents #
A flashcard is something that goes in the game card slot, and contains a microSD card slot. If you do not have a flashcard, you are done with this guide.
- For cheats, widescreen, and other nds-bootstrap features to work, keep the
Game Loadersetting set tonds-bootstrap - As B4DS mode will not be used in nds-bootstrap in this case, compatibility will mostly be the same as running from the 3DS’ SD card slot
If you have an R4(i) Ultra #
- Follow this guide starting from
Flashcard Kernel- You can safely ignore the warnings
- Open TWLMenu++ Settings
- Switch to the
Misc settingspage - Turn on
Slot-1 microSD access - Exit TWLMenu++ Settings by pressing
Bbutton- If you end up in the DS Classic Menu, press
Bagain
- If you end up in the DS Classic Menu, press
If you don’t have an R4(i) Ultra #
- Create a file or folder called
primaryinsd:/_nds/(not the flashcard one), so that TWiLight Menu++ reads settings from the console’s SD card after it starts your flashcard - Follow this guide starting from
Autobooting TWiLight Menu++ - Copy the
BOOT.NDSfile fromTWiLightMenu-Flashcard.7zto your flashcard’s microSD card root - Open TWLMenu++ Settings
- Switch to the
Misc settingspage - Turn on
SD access in Slot-1 - Turn on
SCFG access in Slot-1 - Turn on
Auto-start Slot-1 - Exit TWLMenu++ Settings by pressing
Bbutton- If you end up in the DS Classic Menu, launch your flashcard
- Otherwise, restart TWiLight Menu++
Switching between SD and flashcard contents #
- Press either
SELECT+UporSELECT+Downto switch between the SD and flashcard contents- If the SELECT menu is enabled, you can do so there as well
- If you use the 3DS UI, touch the Game Card/SD Card icon
- If you use the R4, GBC, or Wood UIs, press
Rbutton
Need help? Join our Discord server: DS⁽ⁱ⁾ Mode Hacking! (English only)