Hardmod
Hardmodding can easily damage your DSi. If you’re trying to unbrick your DSi, then you should try ntrboot first.
Hardmodding is when you physically solder the motherboard of the Nintendo DSi to an SD card adapter in order to be read on a computer. This is useful for restoring NAND backups, viewing NAND on your PC, etc…
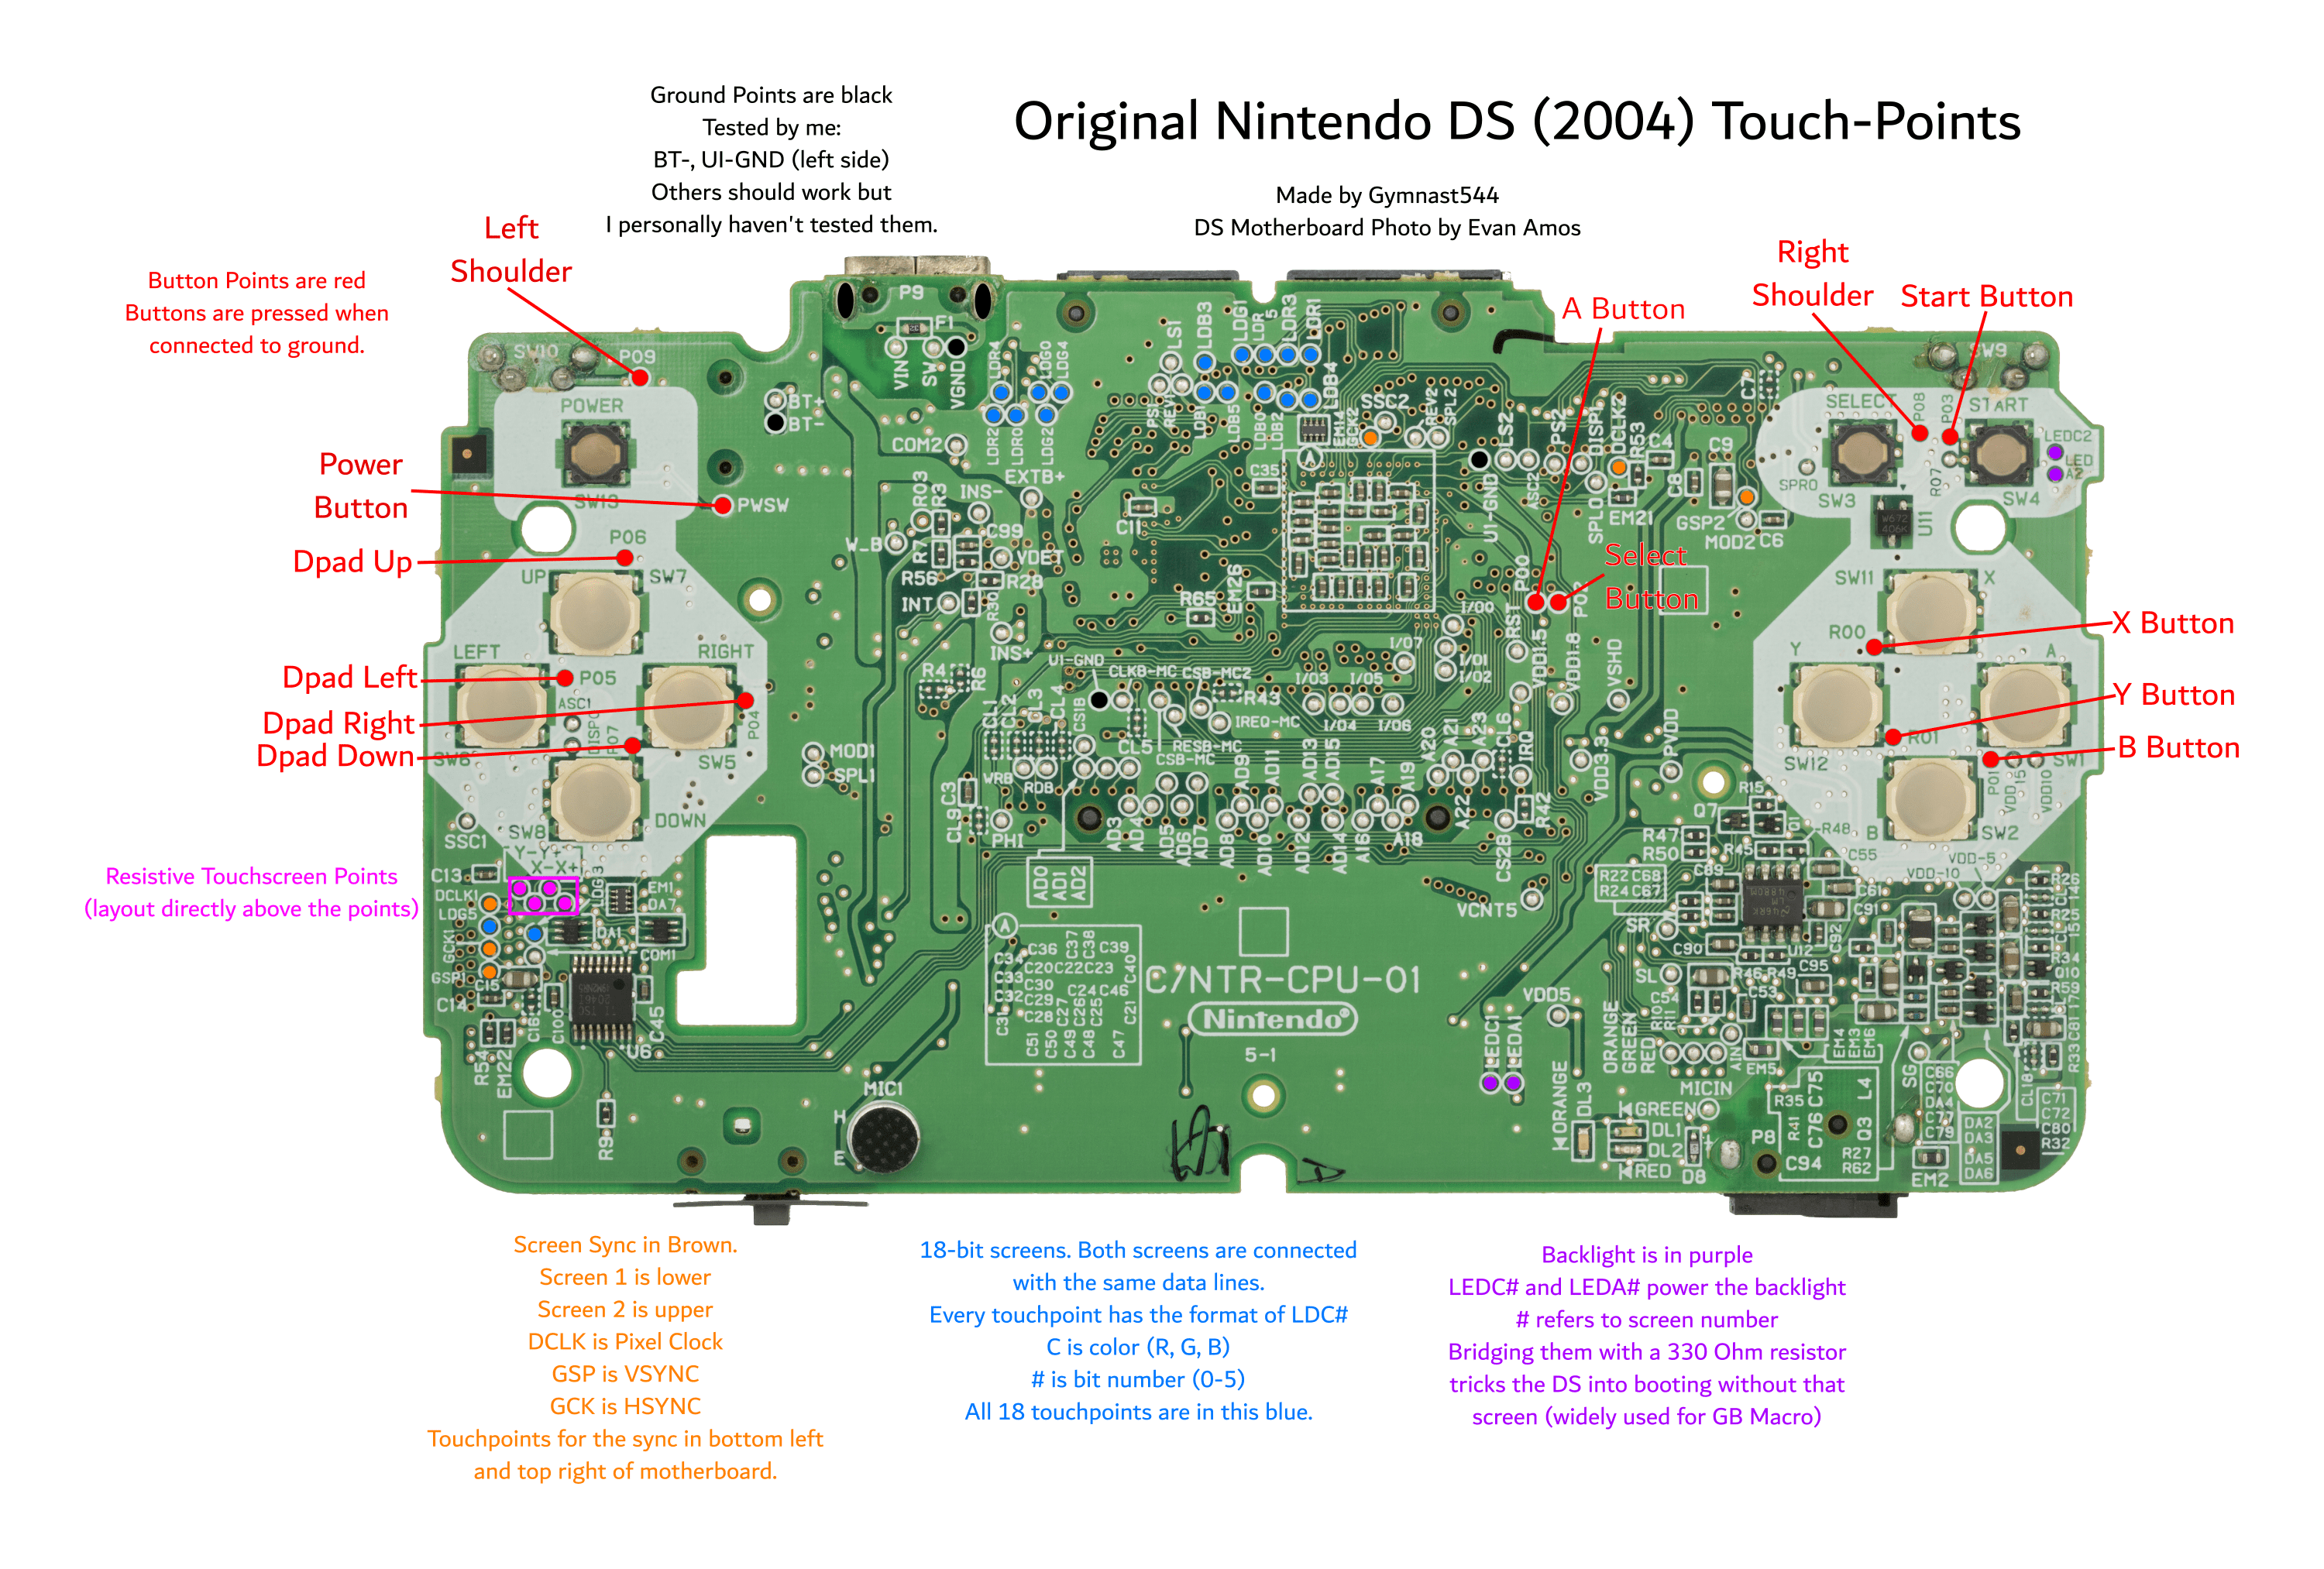
Nintendo DS #
Nintendo DSi #
To hardmod a Nintendo DSi/DSi XL (LL) you will need: - Pencil tipped soldering iron - Very fine wire, 28AWG or smaller, preferably 30AWG+ - SD to microSD adapter - An SD card reader able to read eMMC chips running in single data-line mode. Here’s a known working one - Win32DiskImager and HxD if on Windows - A valid NAND backup of the DSi you are hardmodding - To be comfortable soldering to pads that are as small as 0.5mm in diameter
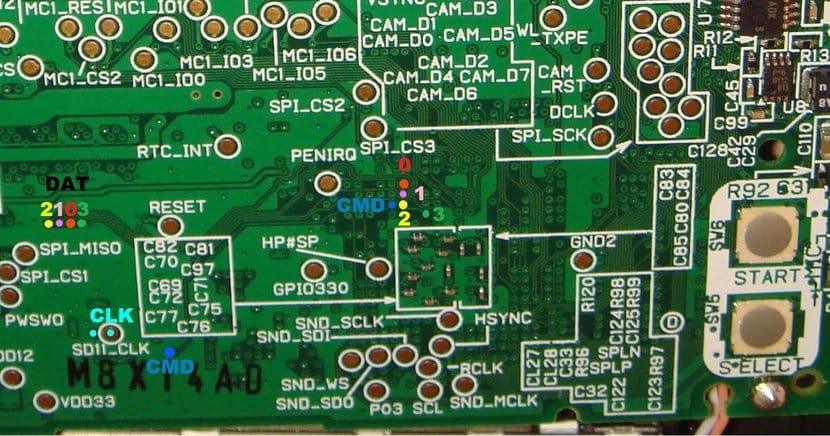
DSi side A pinouts #
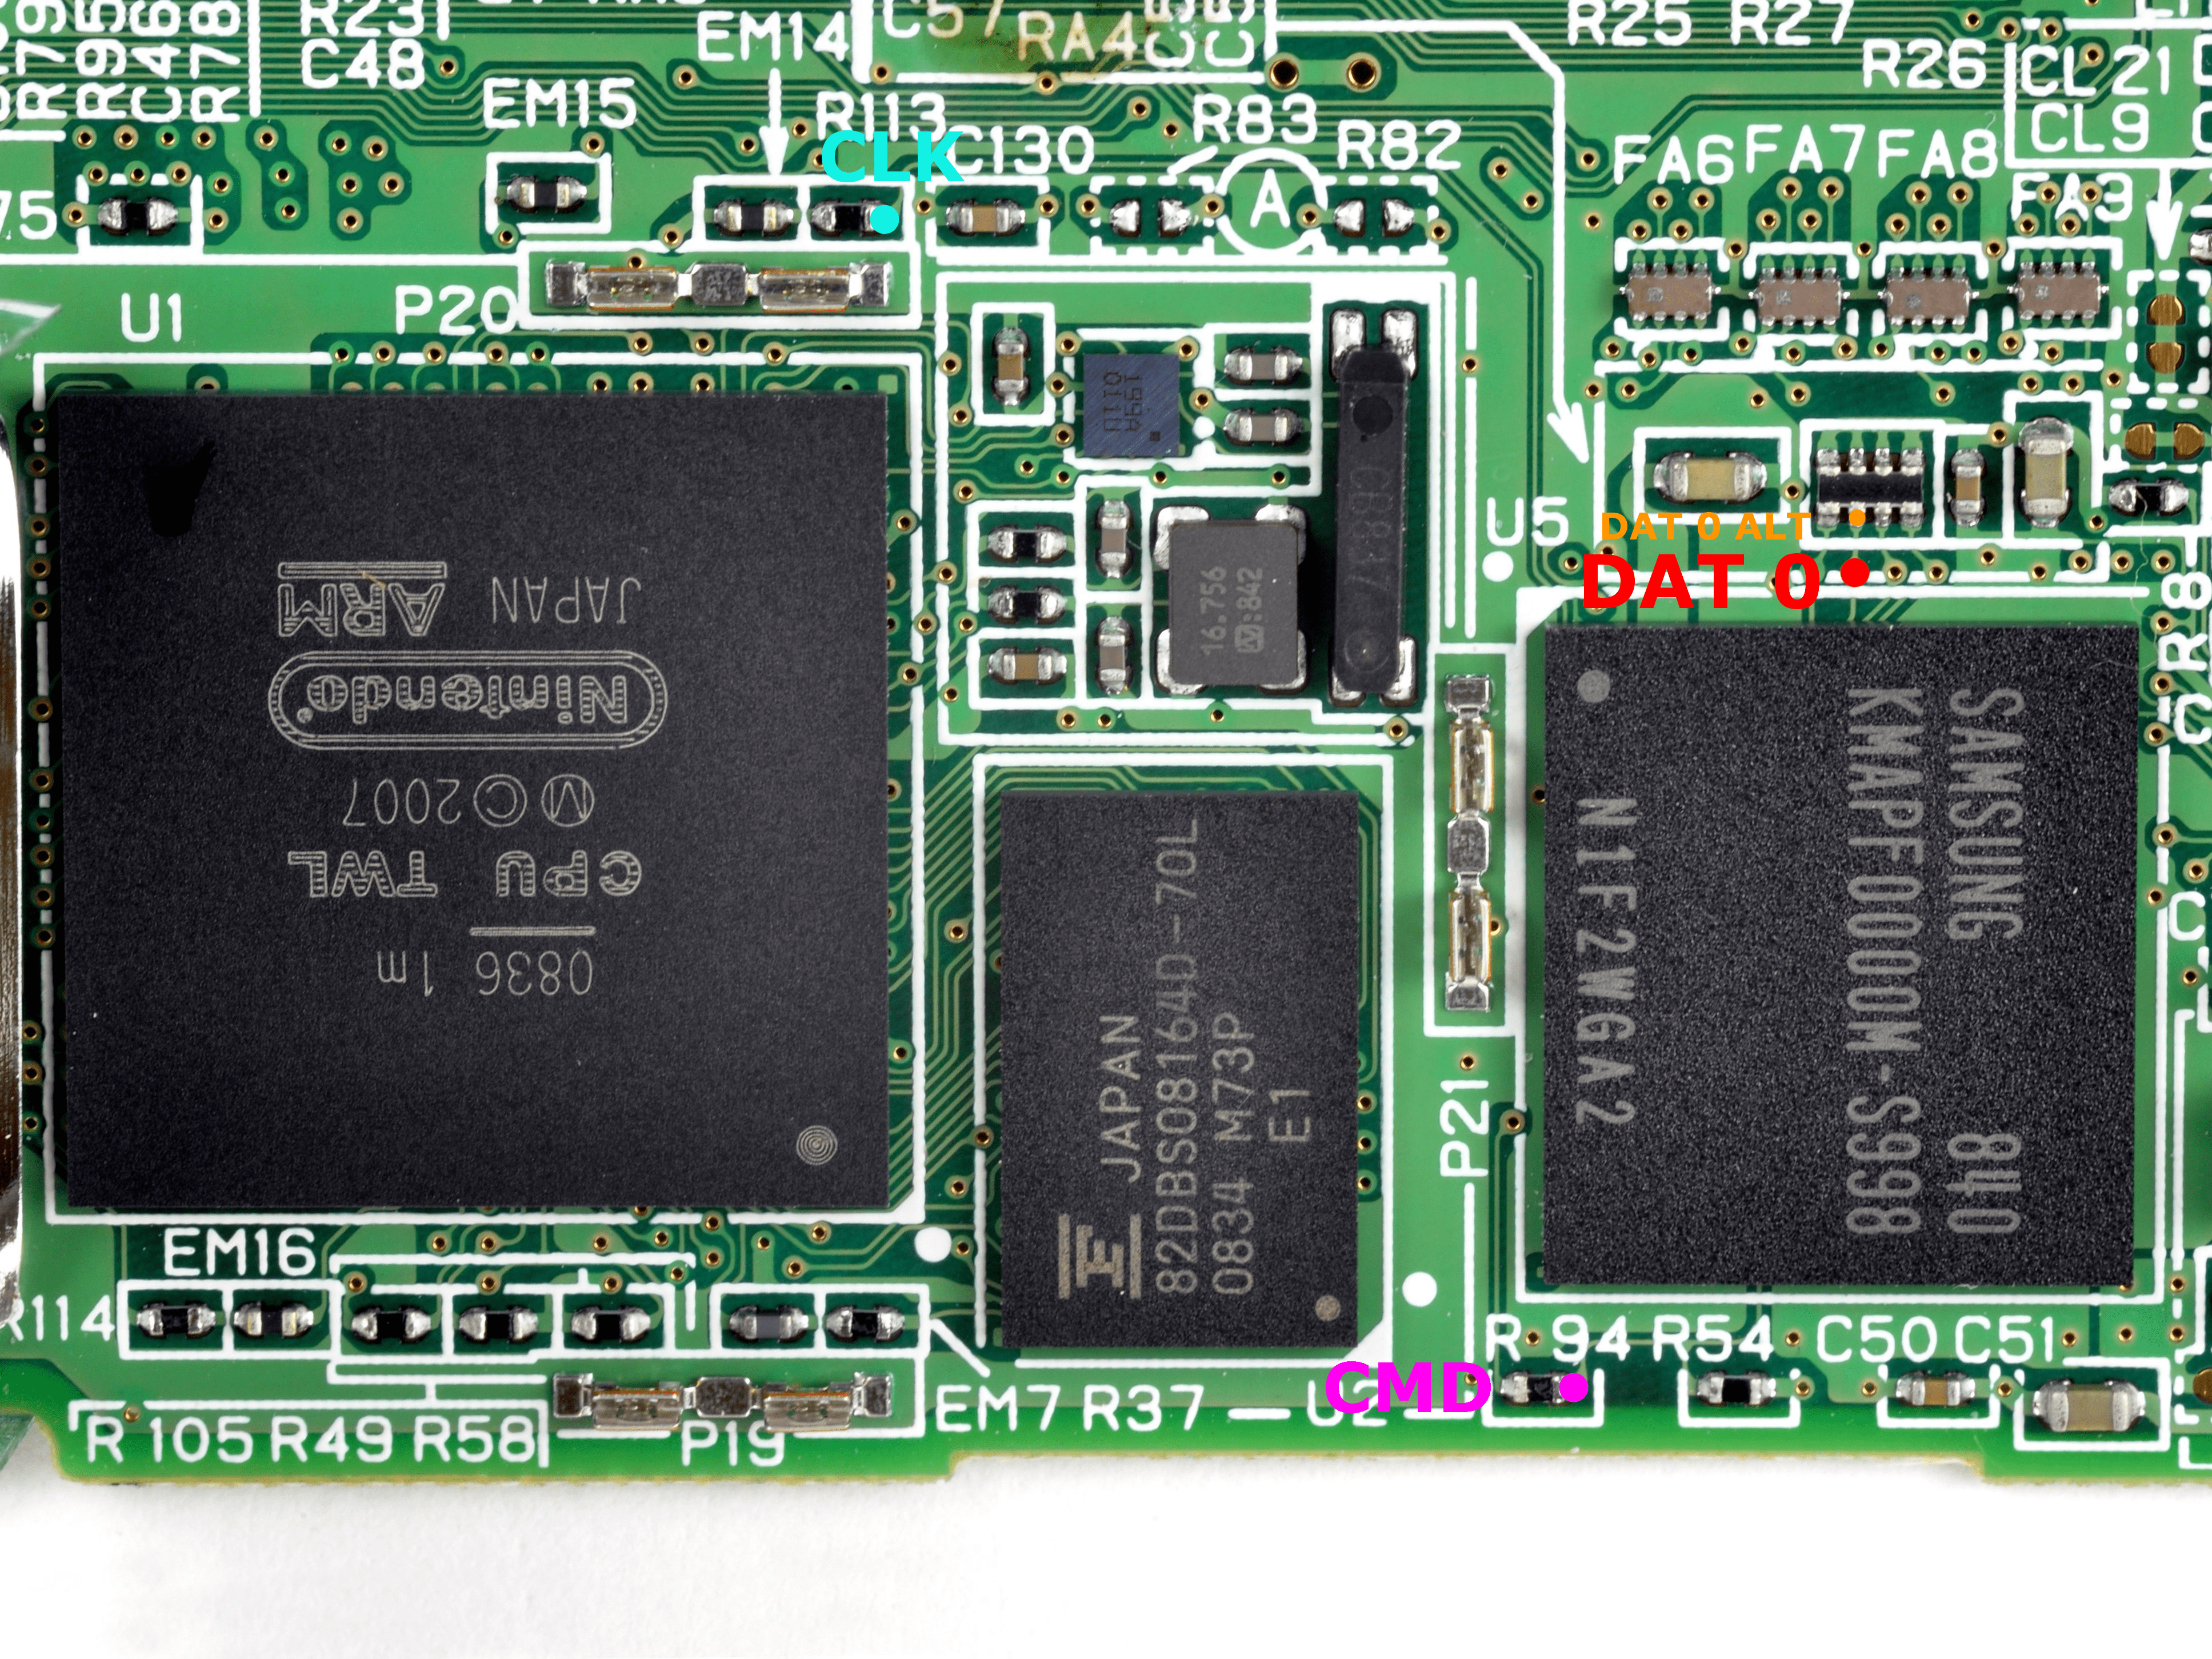
DSi side B pinouts #
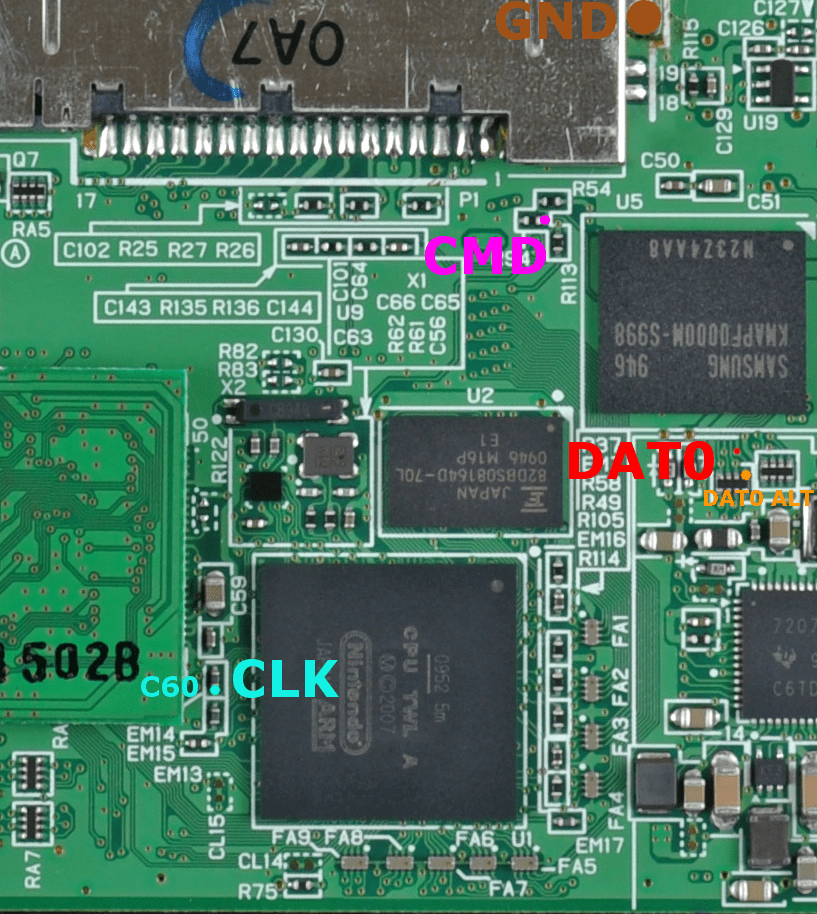
DSi XL side B pinouts #
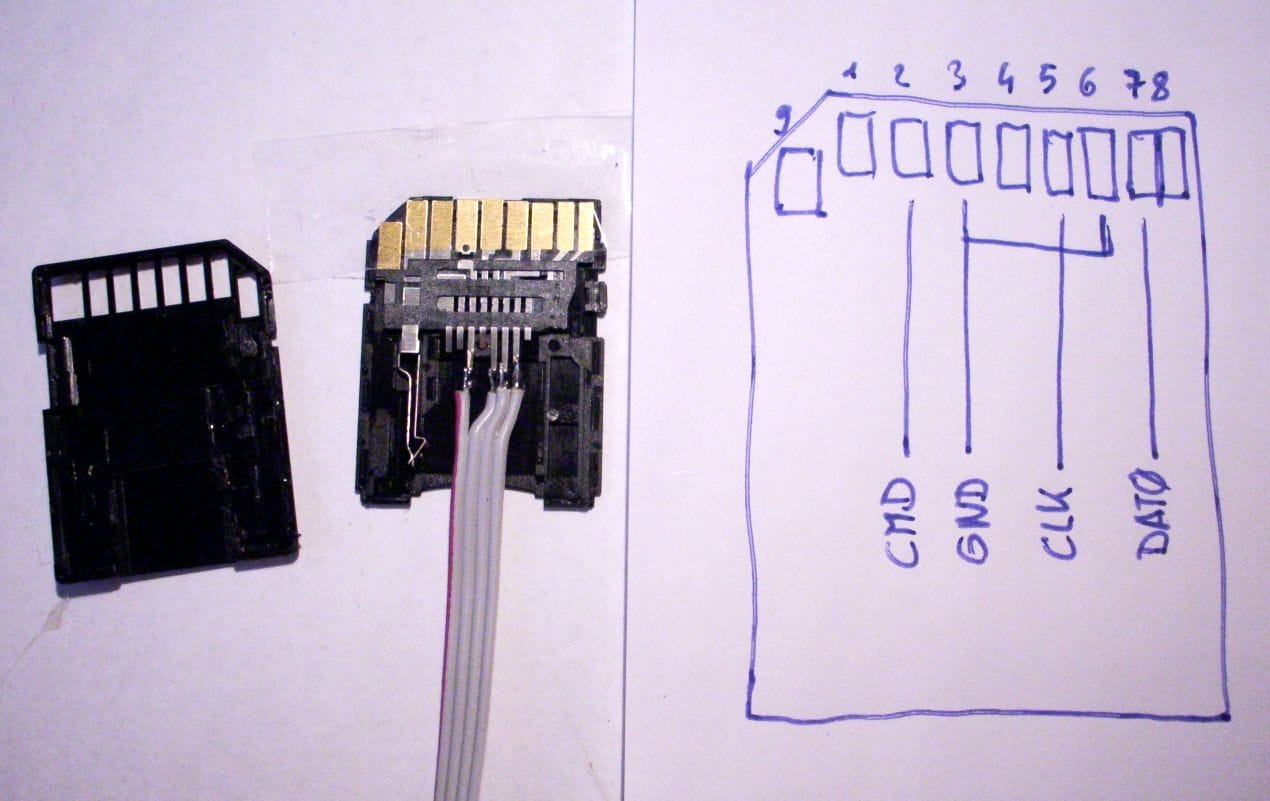
- You will need to solder the points on the motherboard to the microSD card adapter
- CMD to pin 2
- GND to pins 3 and 6
- CLK to pin 5
- DAT0 to pin 7
Soldered microSD adapter example #
- Insert the microSD card adapter into your computer
- WARNING - Windows will ask you to format it: DO NOT format it - this might cause irrepairable damage
Removing the no$gba footer #
You will first need to remove the NOCASH footer from the backup you are flashing to the DSi. This can be done using the hiyaCFW helper.
- Download the version for the operating system you are using
- Run the script, selecting the NAND backup you wish to flash to your DSi
- Switch to NAND mode with the button to the left of the file path
- Click
Startto create the NAND backup without the no$gba footer
- Once the script completes, there should be a file with a long name ending in
-no-footer.binin the folder where your terminal is open- Use this file as the NAND image you flash onto the DSi
Flashing the NAND backup #
- Open Win32DiskImager
- Click the folder icon and browse to your desktop. In the text box, write
NAND_0.bin. When selecting type, chooseAll types *.* - Choose the device that is the DSi and click read
- Once it is done, click the folder icon, change the name to
NAND_1.binand read again - Open HxD and drag both files into the editor. Go to the top bar, click “Analysis”, click “File compare” from the drop down menu, then click “Compare”.
- Choose to compare both files then click OK when done
- If it says “The chosen files are identical.”, you are good to go to the next section
- If it doesn’t say that, and both NANDs aren’t around 240 MB, dump NAND_1/NAND_0 again
- Open Win32DiskImager, click the folder icon and choose your existing NAND backup you created before
- Flash it with the
Writebutton - Unplug the SD card adapter and attempt to turn on the DSi
- Work out where the SD card is mounted
- Linux:
- Unplug the SD card adapter
- Run
lsblkin a terminal - Plug in the SD card adapter
- Run
lsblkagain - This time a new device should appear
- It may be called
/dev/sdb, make sure you note down what it is called on your computer
- It may be called
- macOS:
- Unplug the SD card adapter
- Run
dfin a terminal - Plug in the SD card adapter
- Run
dfagain - A new device should appear in the list
- It may be called
/dev/disk1s1, make sure you note down what it is called on your computer
- It may be called
- Linux:
- Dump the NAND
- Run the following command in a terminal:
cat {device-name} > nand0.bin- Replace
{device-name}with the SD card mount location - E.g
cat /dev/sdb > nand0.bin - Then run
cat {device-name} > nand1.bin
- Run the following command in a terminal:
- Compare NAND dumps
- Run the following command:
- Linux:
md5sum nand0.bin nand1.bin - macOS:
md5 -r nand0.bin nand1.bin
- Linux:
- Check that the hash generated matches each other
- If not, redump the NAND, adjusting the wiring if necessary
- Keep on redumping the NAND until the hashes are identical
- Run the following command:
- Flash NAND
- Locate the NAND backup you created before on the console
- Run the following command:
cat {existing-nand-backup} > {device-name}- Replace
{existing-nand-backup}with the location and name of your old NAND backup - Replace
{device-name}with the mount point of the SD card
At this point you may unplug the SD card adapter and attempt to turn on the DSi. If all went well, the DSi should have booted to the state it was when the backup was created!